I wasn’t sure if I should post these photos yet, but I thought I’d keep it real and show you the progress we’ve made so far. Just to recap, we are in the process of renovating our lounge (also known as the ‘fireplace room’). It’s a long process and we are nowhere near finished. But we’ve made lots of progress recently and my vision for this space is getting clearer. Why is it taking so long, I hear you ask? Well, for quite a few reasons actually. I really want to make sure we do everything right and choose timeless materials that will last for years (and that I will not get bored of). I don’t think there is no shame in admitting that decorating takes time. I feel like social media and Pinterest are obsessed with quick, immediate make-overs which aren’t always realistic, or even smart. It’s ok to take your time and make sure you get the result you’ve always wanted. From the moment we decided to demolish the old fireplace I knew that this would be a long project. In fact, I’ve enjoyed the whole thing (as crazy as it sounds) so much that I don’t want it to be over. I’m having way too much fun with my Pinterest boards and searching for the perfect paint colours. I’ve had other things to prioritise, but I am positive, if everything goes according to plan, this room will be looking (more) finished sometime early next year.
Here’s what we’ve done so far..
D E M O L I S H I N G T H E O L D F I R E P L A C E
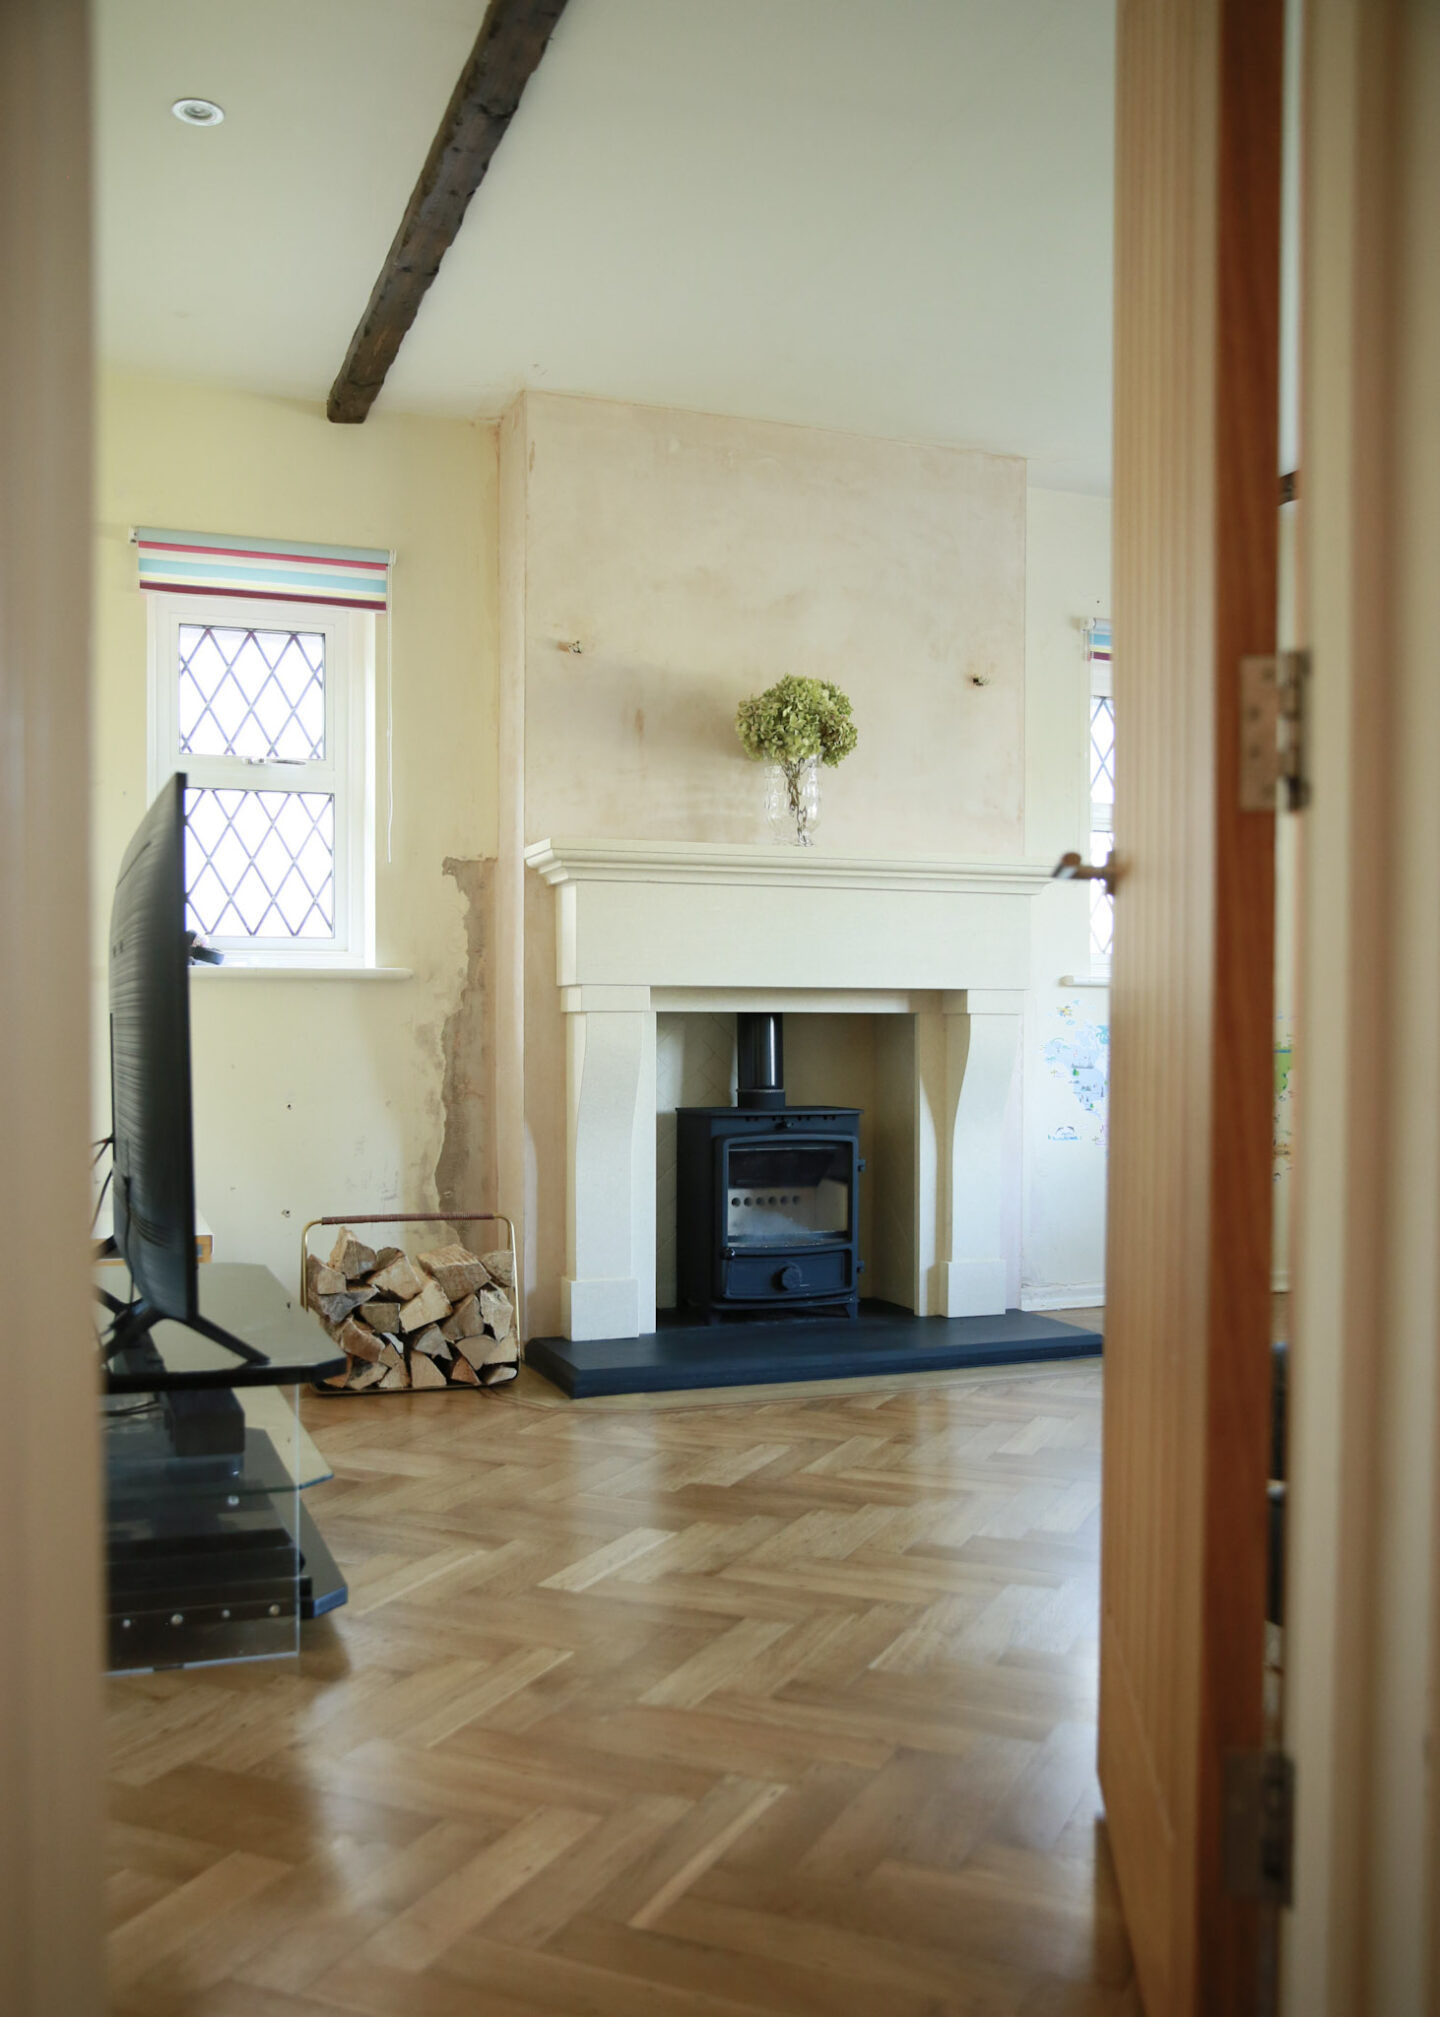
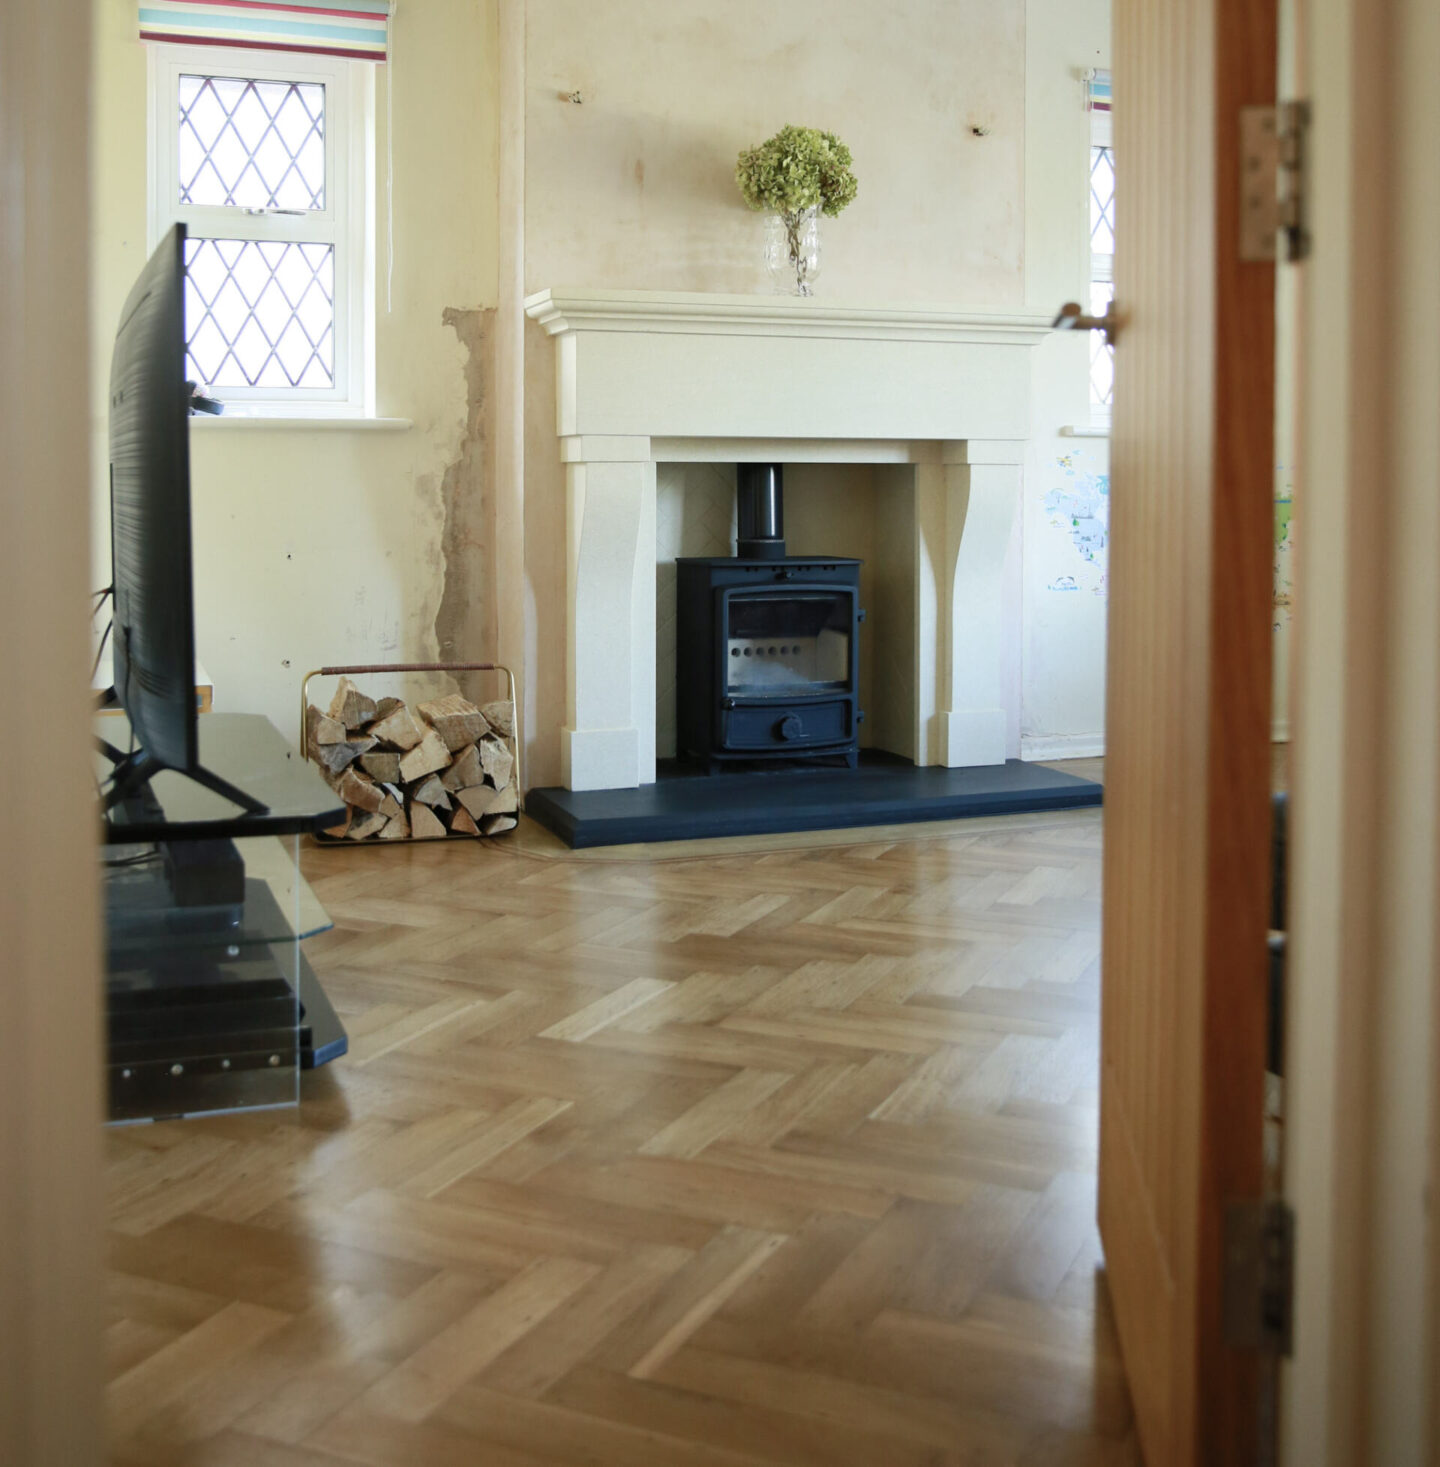
We hired a Kent-based company, Kelvin Fireplaces, to carry out all the work for us; from the designing stage to the fitting part. They have their own contractors who we used for the whole project. We had to hire our own skip but they did pretty much everything else. The demolishing part took about 4 hours which was a nice surprise. It was quite noisy (and messy) but the guys did a really neat job without damaging anything else in the process. We had to have the fireplace opening replastered which was another 2 days worth of work. We also found that the old fireplace opening was missing a lintel, which meant that a new one had to be installed. You should always have a lintel above your fireplace to support the weight of the chimney. A lot of older fireplaces won’t have one though but it is worth factoring in the cost in case you need one. I did an instagram reel where you can see the before and after. It’s shocking how many bricks we were left with afterwards. I was so happy to see the old brick fireplace gone as it immediately changed the look of the room. It’s much brighter and less busy now (although there’s so much that needs doing still).
M E A S U R E M E N T S & O R D E R I N G T H E F I R E P L A C E
We couldn’t order the new fireplace until the old one was removed since we needed exact measurements. The old fireplace was technically a little bigger than the new one. It was too big really. I have no idea why they went for such a large size. The chamber itself was quite small and the heat output wasn’t great. Our installer, Kelvin fireplaces, took the measurements and gave me advice on what size would work best for the space. I decided to add a bit of height to the original drawings (you can see them here) to make them even more dramatic. We also rediscussed materials and other finishes at this stage. I had to pay in full before ordering as the fireplace was custom-made. We went for a Spanish Creme Argel fireplace with a black-honed floor slate and black matt wood burning stove. Although I love the look of all cream fireplaces, they can be very impractical, especially with a wood burner. So, I opted for a black slate heart instead; it has been the best decision we’ve made. It’s so easy to maintain, scratch-resistant (to an extent), and looks amazing. I chose chamfered finish for the slate heart to keep the design consistent throughout. The lead time was app. 4-6 weeks and I think we were pretty lucky to have it installed within a month of ordering.
F L U E L I N E R & S C A F F O L D I N G
This was definitely not the most glamorous part but it had to be done. One of the reasons why we hired a reputable installer for the job was so that all the building and safety regulations would be followed. We also had to have a new flue liner installed and the chimney rendered. We used external contractors recommended to us which turned out pretty good. The scaffolding had to stay up for over a month but the contractors broke a few roof tiles in the process which obviously delayed things a bit. We also happen to live in a conservation area which meant that all the chimneys have to look identical which our contractor messed up a bit, but luckily he managed to rectify his error pretty quickly. Never a dull moment eh?

I N S T A L L A T I O N
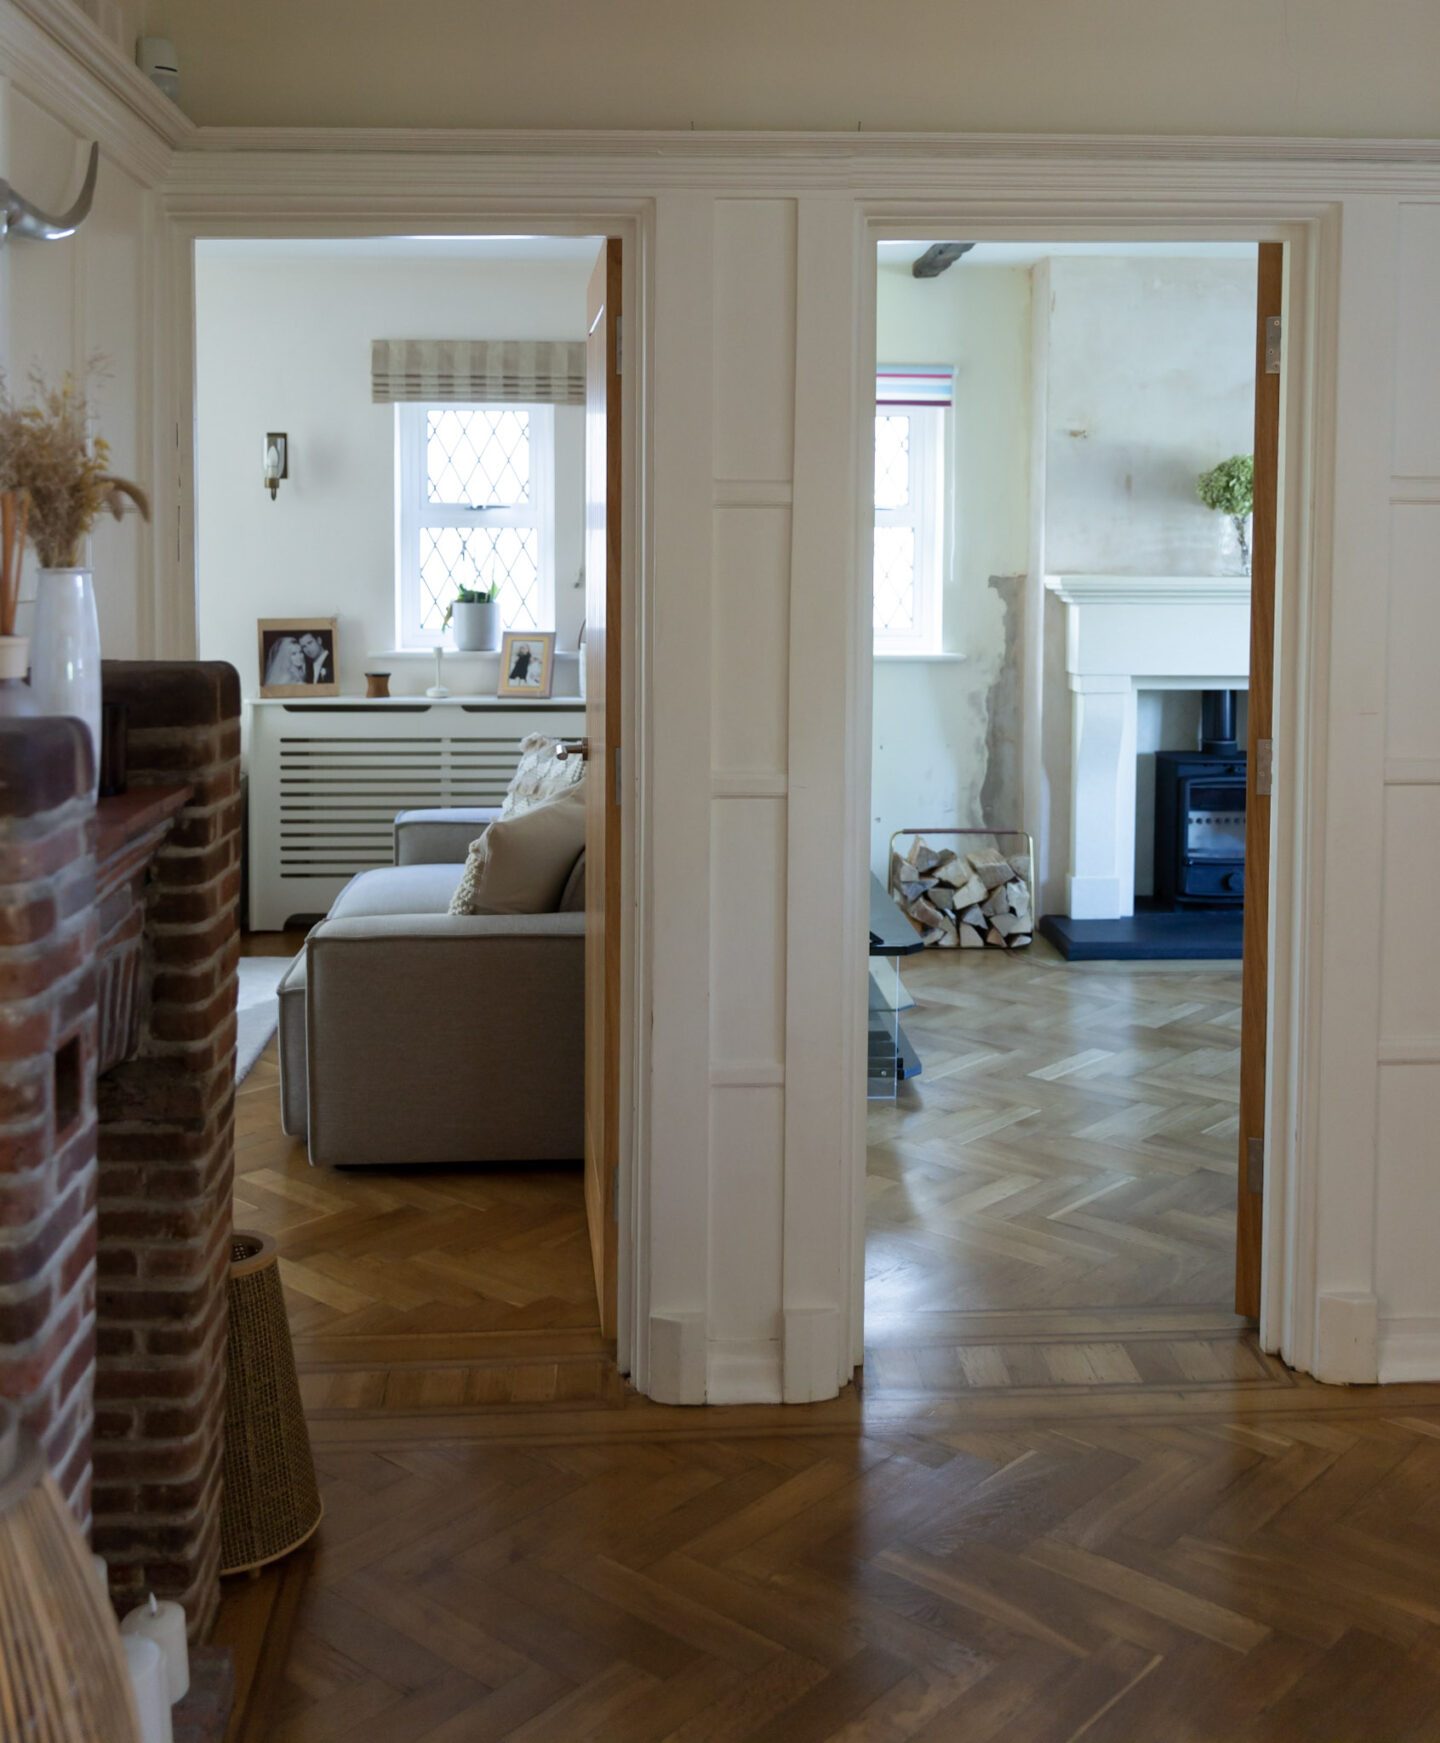
Installation day was exciting and nerve-wracking at the same time. The fireplace itself was more than we had budgeted for, so it had to be 110% perfect. The Spanish made fireplace came in several pieces and had to be assembled. I made sure to inspect every single piece of stone before installation, as there is no going back once it’s fully built. Luckily it was perfect with some natural imperfections you can expect in a natural stone. I have to say, it was even more striking in real life. I had seen it in the showroom but it looked so much better in our lounge. Although our room is still in a such state, the fireplace has already made a huge difference. It also helped me decide on the rest of the finishes; floors, wall colour, accents etc.
R E S T O R I N G T H E P A R Q U E T F L O O R
Finding out we have the original 1920s parquet flooring under the carpet was a nice surprise. We have parquet flooring almost in every room downstairs and it made sense to keep things consistent. We were recommended a great carpenter, Naos Floors, to restore the old flooring and they did an amazing job as you can see. The floor looks like new and matches the other rooms flawlessly. They had to sand and repair the floor, as well as blend in some new wood to fill the gaps. The new floor has made a huge difference and is so much more practical. Carpets downstairs should be banned really (especially if you have kids!) I feel so lucky that we got to bring back the original flooring and save a bit of money in the process. I always wanted wood flooring in here and brand new parquet flooring would have been thousands. The installation takes ages which is why it’s one of the most expensive options for flooring. It’s beautiful and worth it though. And if you can restore any old floorboards instead of paying for new ones, why wouldn’t you?
WH A T ‘S N E X T ?
I have a pretty clear idea now of how I want this room to look. Having the fireplace installed really helped me to visualise the space better. I’m going to keep it neutral with some brass accents and hopefully a feature wall. This room will have a dual purpose, so I’ll need to keep it in mind when planning. We’re thinking of installing a tv accent wall with some type of paneling and I’m currently in the process of getting quotes. I want to create a focal point in the room with the TV as this will also be our cinema room. I’m not quite sure which material we’ll go for but I love the idea of a concrete-painted wall or some kind of wood slat. Obviously, I’ll need to speak to some experts first, but I know it will be amazing once it’s all done. Soft furnishing and furniture will come last, although I already have a colour palette in mind.
I’ll keep you posted on any progress, but in the meanwhile feel free to pop your questions in the comments box below!

Magnificent fire place, and the floor is stunning.
Magnificent fire place, and the floor is stunning.
Author
Thank you! I am loving the progress we’ve made so far x